
Showing posts with label inks. Show all posts
Showing posts with label inks. Show all posts
Monday, September 20, 2010
Testing Inks
I think I'm perpetually trying to figure out what tools are like and which ones are best. If you recall from my past posts, I'm currently interested in inking. You want to go with what you like best and best meets your needs. In my case, I have two general needs: a good ink for general sequential inking and a good ink for marker pieces. For the later, you want one that is pigment based and waterproof to resist the alcohol of the marker, which is hard to find. There are inks out there that work well with markers, especially in pigma microns, but not so much dip or loose inks unless you know where to look. The first inks I learned that would work well with markers are Deleter Black, but only a few of the six or so Black inks they make are good for markers. This is where reviews are a lifesaver, and help point out ahead of time which ones work.
 Of course, sometimes you just have to test them, especially if some inks are glossy while others are matte. Right now, I want a good matte ink that blends well in a nice even black. You can see I tried seven inks on Bristol smooth paper to see which stood up well to pen inking with a G-pen nib, a quick brush applied solid black, and marker tests. I'm not the first to test inks to see how they hold up; go to this LiveJournal post for a more thorough series of test. I tested seven inks: Dr. Ph. Martin's Bombay Black India Ink, Yasutomo black sumi ink, Dr. Ph. Martin's Black Star Waterproof India Ink matte, Winsor and Newton black India ink (watercolor drawing ink), Deleter Blacks 2, 3, and 5. The scan doesn't show it, but the sumi ink, W&N and Deleter Black 3 have a sheen; not noticeable in a scan but there. The one I liked the least was W&N's watercolor ink; it wasn't a very even black and had a the worst feathering when used with the pen. For now, I'm planning to use Black Star matte for sequential inking because it was so dark and matte, and Deleter Black 5 for marker work. This is not set in stone, and there's always the possibility I could change my mind in the future.
Thursday, August 26, 2010
Bena (finished)
Here's the finished version of the piece I started earlier. Okay, really they're the inked with pencils and the inked and marker colored version.

 Done largely with a Zebra G-pen, Winsor-Newton Series 7 (solid blacks), and Deleter Black 6. I wish the solids were smoother, but not bad for my first real attempt.


Friday, June 18, 2010
Inking attempts: G-pen and Maru
You may recall my last post was where I showed off the initial results of my inking with a Saji pen nib. This post is also about trying out pen nibs, and will probably be the last one for a while about the initial results.

G-pen
The first set of images are from a G-pen. This particular nib has been mentioned in a few books on inking from Japan, and I can kinda see why. It's a nice nib, giving a lot of variety and gave me pretty good control overall. The lines seem very nice to my eye.
What I Learned from My Attempt
I'm not sure if it was because I knew what to expect from the previous attempt or if the nib was just better, but the ink flowed more smoothly. There wasn't as much catching on the paper that I had with the Saji. I knew from this test that in the foreseeable future, I'll be using the G-pen nib for inking.
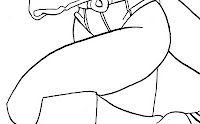
Maru
 This is the last of the trial set I had ordered. Unlike the previous two, the Maru pen nib is meant for fine lines, so if you're someone who wants thin lines, go with this one. It does have some flexibility, so there is variety available, but thin lines are its strength.
This is the messier of the two attempts posted tonight. The cape is thicker and messier because I attempted to do some inking with a brush, which clearly wasn't that great. The smudges came from my hand getting into the ink, Deleter Black 2, which hadn't dried yet when my hand went over it.
What I Learned from My Attempt
This is another nib that caught on the paper, or felt like it. I got the overall thin lines I wanted, and slightly thicker ones with only a little effort. The Maru is probably not the best option if you want to fill blacks. It is not good for places where you want solid black, like the pupils and the eyelashes. Curves were a little tricky, but that may be due to my inexperience.

For now, most of my inking attempts will be made with the G-pen, but I can imagine ways of using the Maru. The Saji will probably be used once I get better with inking in general and can better manipulate it. Using all three in an image is not out of the question.
So that's it right now on my inking. Future posts will be back to progress and finished images.

G-pen
The first set of images are from a G-pen. This particular nib has been mentioned in a few books on inking from Japan, and I can kinda see why. It's a nice nib, giving a lot of variety and gave me pretty good control overall. The lines seem very nice to my eye.
What I Learned from My Attempt
I'm not sure if it was because I knew what to expect from the previous attempt or if the nib was just better, but the ink flowed more smoothly. There wasn't as much catching on the paper that I had with the Saji. I knew from this test that in the foreseeable future, I'll be using the G-pen nib for inking.

Maru
 This is the last of the trial set I had ordered. Unlike the previous two, the Maru pen nib is meant for fine lines, so if you're someone who wants thin lines, go with this one. It does have some flexibility, so there is variety available, but thin lines are its strength.
This is the messier of the two attempts posted tonight. The cape is thicker and messier because I attempted to do some inking with a brush, which clearly wasn't that great. The smudges came from my hand getting into the ink, Deleter Black 2, which hadn't dried yet when my hand went over it.
What I Learned from My Attempt
This is another nib that caught on the paper, or felt like it. I got the overall thin lines I wanted, and slightly thicker ones with only a little effort. The Maru is probably not the best option if you want to fill blacks. It is not good for places where you want solid black, like the pupils and the eyelashes. Curves were a little tricky, but that may be due to my inexperience.

For now, most of my inking attempts will be made with the G-pen, but I can imagine ways of using the Maru. The Saji will probably be used once I get better with inking in general and can better manipulate it. Using all three in an image is not out of the question.
So that's it right now on my inking. Future posts will be back to progress and finished images.
Thursday, June 10, 2010
Inking attempts: Saiji pen nib
Tools. I like tools, especially art tools. I'm like a lot of people who is interested in what tools artists use and how they use them, trying to figure out the limits, advantages and disadvantages of each one. Only challenge is learning how to actually use the tools. Something I want to work on with a lot of materials. This time, inking.
To keep this short(er), I've been interested in inking my artwork for both illustrations and especially for my sequential work, and I've been wanting to move past using Pigma microns (including my current go to pens, Copic Multiliners) to pen and brush inking for a while for at least one reason: line variety. You can get some variety with microns, but it takes some work. Nib pens and brushes can get a lot of variety in one tool. Each varies, pros and cons and all that. And they take more practice to get really good. I don't plan to drop microns completely, but I want to build up my resources.

Here is my first attempt at inking an actual image with a Deleter brand Saji pen nib, using Deleter Black 3. You probably recognize the image as my Power Girl image from a while back, and I liked it enough I thought I'd use copies of it for practicing on. Helps to get over the whole fear of damaging a nice piece with bad inking when you're working on a copy.
I don't plan to post every attempt at inking, but the first attempt at a tool will most likely go up to act as gauge of improvement.
What I Learned From My Attempt:
It's been mentioned in a couple of books and articles about inking, but you don't realize how much it is so until you try it: nib pens are scratchy and tend to catch on the paper. That takes some getting used to after working with materials that don't catch as much. Sensitivity is a much larger issue than with microns. There are a few places where I let up the wrong way and kind of flicked the pen, ruining an otherwise smooth line. There are a few splatters and places where I didn't have enough ink for the width I attempted. Placement is a biggie too. Lastly, it's best to occasionally clean the tip because of said scratchiness or digging into paper; the thick line on PG's upper left arm was caused by some paper fiber getting caught on the tip.
I can't really say this is better than my original inked piece, but I'm glad to be attempting it because there's at least one place I'm pleased with. That's this:

Yep, that line of her upper leg, and to a degree, the bottom line for bottom of her thigh. It has the line go from narrow to thick and narrows again. I like that.
To keep this short(er), I've been interested in inking my artwork for both illustrations and especially for my sequential work, and I've been wanting to move past using Pigma microns (including my current go to pens, Copic Multiliners) to pen and brush inking for a while for at least one reason: line variety. You can get some variety with microns, but it takes some work. Nib pens and brushes can get a lot of variety in one tool. Each varies, pros and cons and all that. And they take more practice to get really good. I don't plan to drop microns completely, but I want to build up my resources.

Here is my first attempt at inking an actual image with a Deleter brand Saji pen nib, using Deleter Black 3. You probably recognize the image as my Power Girl image from a while back, and I liked it enough I thought I'd use copies of it for practicing on. Helps to get over the whole fear of damaging a nice piece with bad inking when you're working on a copy.
I don't plan to post every attempt at inking, but the first attempt at a tool will most likely go up to act as gauge of improvement.
What I Learned From My Attempt:
It's been mentioned in a couple of books and articles about inking, but you don't realize how much it is so until you try it: nib pens are scratchy and tend to catch on the paper. That takes some getting used to after working with materials that don't catch as much. Sensitivity is a much larger issue than with microns. There are a few places where I let up the wrong way and kind of flicked the pen, ruining an otherwise smooth line. There are a few splatters and places where I didn't have enough ink for the width I attempted. Placement is a biggie too. Lastly, it's best to occasionally clean the tip because of said scratchiness or digging into paper; the thick line on PG's upper left arm was caused by some paper fiber getting caught on the tip.
I can't really say this is better than my original inked piece, but I'm glad to be attempting it because there's at least one place I'm pleased with. That's this:

Yep, that line of her upper leg, and to a degree, the bottom line for bottom of her thigh. It has the line go from narrow to thick and narrows again. I like that.
Subscribe to:
Posts (Atom)